5 Steps To Apply Contour On Your Face
By: Priyanka Maheshwari Wed, 22 Apr 2020 1:51:15
Ever wondered that how your favorite celebrities have such flawless and perfect face structure? Kim Kardashian, kareena kapoor have well defined check bones and nose, well the secret behind this is “contouring”. Face contouring can be used to highlight your best features and also to change the look of the features you don’t like much. I personally don’t like contouring on a daily basis as it is a bit time consuming.The highlight areas are bright and are the “hills,” while the contours are darker and like the “valleys.” Use light color bronzer or darker eye shadows in the crease parts to create intensity and contour. And also use highlighting pencils or illuminators in the highlight parts to brighten your whole face. It will definitely make a huge and incredible difference.

- The first thing you’ll need is three types of foundations, one which matches your skin tone, one foundation which is lighter than your skin tone and one foundation which is darker than your skin tone.
- A setting powder
- Foundation brush
- Blending brush
- Powder brush
* After moisturizing, apply foundation which matches your skin tone.
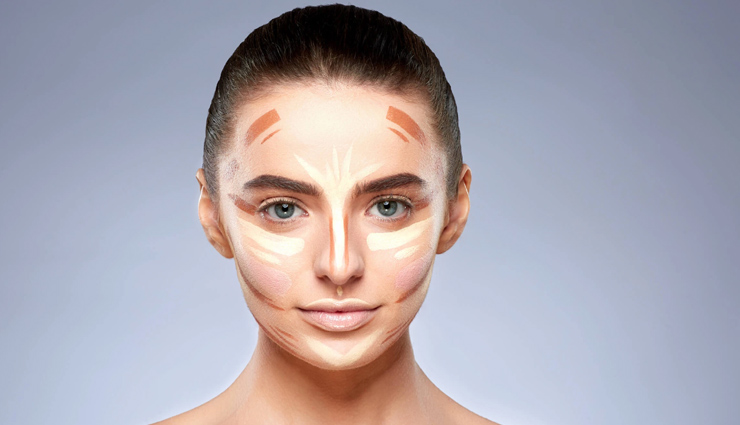
* Take flat foundation brush and start applying light foundation under your eyes and middle of forehead.
* Also apply light foundation on sides of nose, under brow bone and along jawline. See the image above to understand in a better way. Don’t blend.
* Now take dark foundation and suck in your cheekbones, now apply it there. Also, apply it at the top of forehead (it will enhance your jawline) and both sides of nose. See the image to understand better, the brown lines show dark foundation application.
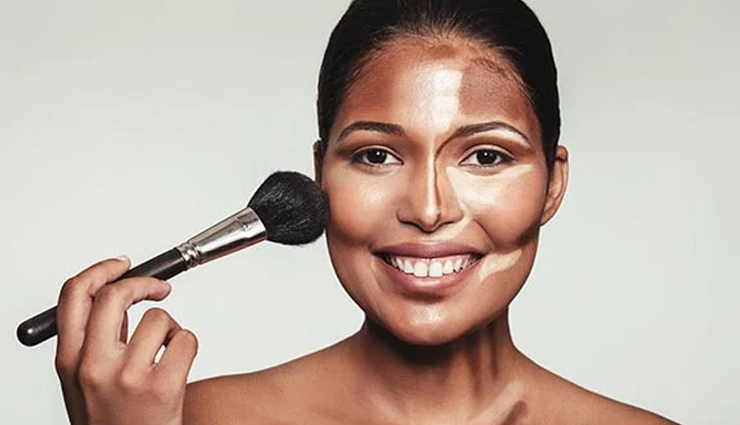
* See yourself in the mirror now and don’t laugh :P. I know you’re looking like a joker but the steps are not yet over. Time for BLENDING, blend everything with blending brush or foundation brush. Keep blending until you see the difference yourself.
* After blending, set everything with powder. Use a powder brush for more defined look and avoid using a puff or sponge.