8 DIY Chocolate Face Masks To Get Glowing And Healthy Skin
By: Priyanka Maheshwari Tue, 03 Oct 2023 9:25:35
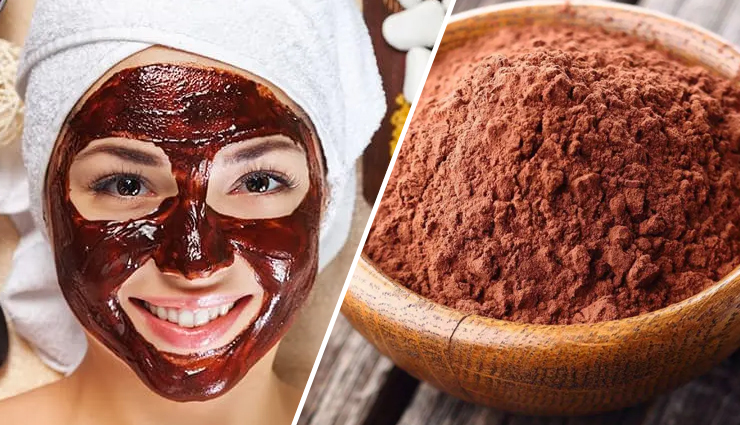
Whether you're looking for a special indulgence, a thoughtful present, or a source of solace during moments of mood fluctuations or tough days, chocolate emerges as that ultimate comfort food that seems capable of solving virtually anything, including potential skin concerns. Indeed, chocolate facial masks may hold the key to achieving the flawless and radiant complexion you've always dreamed of. This revelation may come as a surprise, but it's entirely factual!
So, how exactly does chocolate contribute to skin enhancement, and is it safe for facial application? In this comprehensive article, we will delve into these questions, providing you with a complete guide on harnessing the benefits of chocolate for your skin and step-by-step instructions on crafting chocolate face masks.
The allure of chocolate extends beyond its delectable taste and comforting properties; it also holds a tantalizing secret when it comes to skincare. While often considered a delightful treat, chocolate has found its way into the world of beauty and wellness as a potential elixir for achieving radiant, flawless skin. In this exploration, we will delve into the remarkable relationship between chocolate and skincare, uncovering the ways in which this beloved indulgence can be harnessed to enhance your complexion and promote a healthy, glowing visage. So, prepare to indulge in a journey that combines the pleasures of chocolate with the promise of beautiful skin.
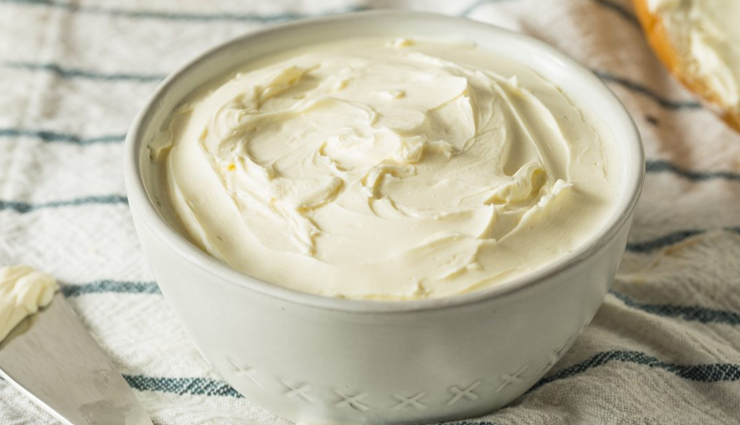
# Lush Chocolate Face Mask For Oily And Acne-Prone Skin
Creating your own homemade chocolate face mask tailored to oily and acne-prone skin is a delightful and effective way to pamper yourself while addressing skincare concerns. This DIY lush chocolate face mask harnesses the power of natural ingredients to combat excess oil, minimize breakouts, and leave your skin feeling refreshed and rejuvenated. Follow this simple recipe to indulge in a spa-like experience right in the comfort of your own home.
Ingredients:
2 tablespoons unsweetened cocoa powder
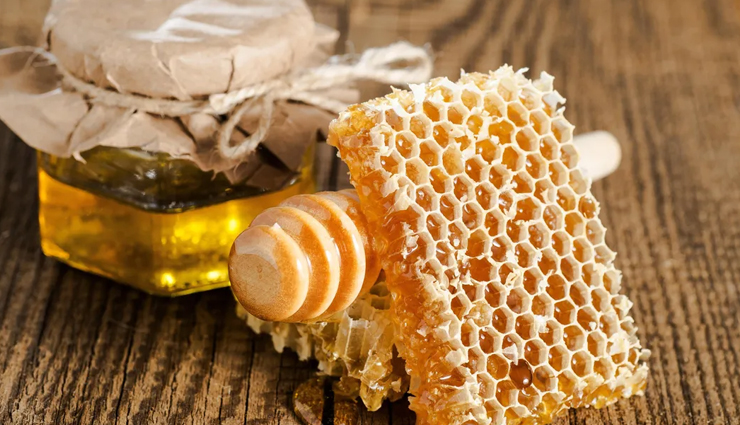
1 tablespoon honey
1 tablespoon plain yogurt (preferably Greek yogurt)
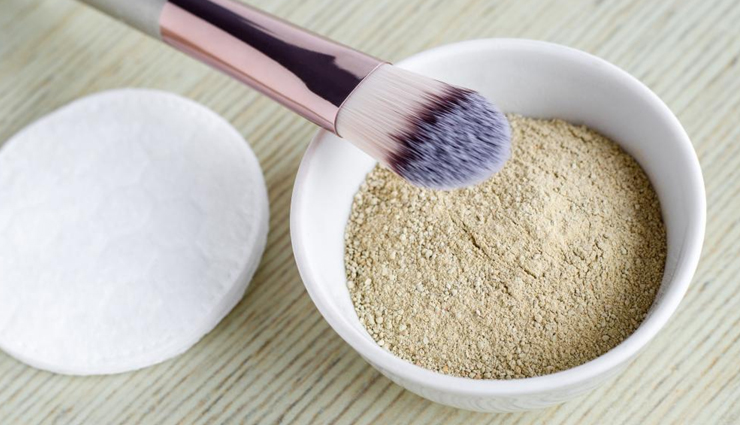
1 tablespoon finely ground oatmeal
1 teaspoon lemon juice (optional)
Instructions:
- Prepare Your Workstation: Ensure your hands and all utensils are clean before starting. Tie back your hair to keep it away from the mask.
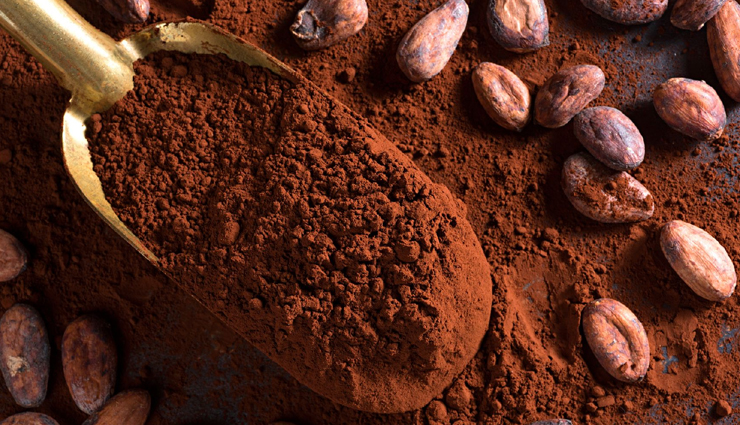
- Combine Cocoa Powder and Honey: In a mixing bowl, combine the unsweetened cocoa powder and honey. Cocoa powder is rich in antioxidants that help fight skin damage, while honey has antibacterial properties that can assist in treating acne.
- Add Yogurt: Introduce the plain yogurt into the mixture. Yogurt contains lactic acid, which helps exfoliate the skin gently and regulates oil production.
- Incorporate Ground Oatmeal: Add the finely ground oatmeal to the mixture. Oatmeal is an excellent ingredient for soothing irritated skin and absorbing excess oil.
- Optional: Add Lemon Juice: If your skin can tolerate it, you can include a teaspoon of lemon juice for its astringent properties. Lemon juice can help tighten pores and brighten the skin. However, be cautious if you have sensitive skin, as lemon juice can be irritating.
- Mix Thoroughly: Stir all the ingredients together until you achieve a smooth, consistent paste. Ensure there are no lumps in the mixture.
- Patch Test: Before applying the mask to your face, it's advisable to perform a patch test on a small area of your skin to check for any adverse reactions.
- Apply the Mask: Using clean fingertips or a brush, apply the chocolate mask evenly to your cleansed face, avoiding the delicate eye area. Allow the mask to sit for about 15-20 minutes.
- Relax: While the mask works its magic, find a comfortable spot to relax. Consider placing cucumber slices over your closed eyes for an added spa-like touch.
- Rinse Off: After the designated time, rinse the mask off with lukewarm water. Gently pat your face dry with a clean towel.
- Moisturize: Finish your skincare routine by applying a lightweight, oil-free moisturizer to lock in hydration without clogging pores.
# Dark Chocolate Face Mask
Creating your own homemade chocolate face mask tailored to oily and acne-prone skin is a delightful and effective way to pamper yourself while addressing skincare concerns. This DIY lush chocolate face mask harnesses the power of natural ingredients to combat excess oil, minimize breakouts, and leave your skin feeling refreshed and rejuvenated. Follow this simple recipe to indulge in a spa-like experience right in the comfort of your own home.
Ingredients:
2 tablespoons unsweetened cocoa powder
1 tablespoon honey
1 tablespoon plain yogurt (preferably Greek yogurt)
1 tablespoon finely ground oatmeal
1 teaspoon lemon juice (optional)
Instructions:
- Prepare Your Workstation: Ensure your hands and all utensils are clean before starting. Tie back your hair to keep it away from the mask.
- Combine Cocoa Powder and Honey: In a mixing bowl, combine the unsweetened cocoa powder and honey. Cocoa powder is rich in antioxidants that help fight skin damage, while honey has antibacterial properties that can assist in treating acne.
- Add Yogurt: Introduce the plain yogurt into the mixture. Yogurt contains lactic acid, which helps exfoliate the skin gently and regulates oil production.
- Incorporate Ground Oatmeal: Add the finely ground oatmeal to the mixture. Oatmeal is an excellent ingredient for soothing irritated skin and absorbing excess oil.
- Optional: Add Lemon Juice: If your skin can tolerate it, you can include a teaspoon of lemon juice for its astringent properties. Lemon juice can help tighten pores and brighten the skin. However, be cautious if you have sensitive skin, as lemon juice can be irritating.
- Mix Thoroughly: Stir all the ingredients together until you achieve a smooth, consistent paste. Ensure there are no lumps in the mixture.
- Patch Test: Before applying the mask to your face, it's advisable to perform a patch test on a small area of your skin to check for any adverse reactions.
- Apply the Mask: Using clean fingertips or a brush, apply the chocolate mask evenly to your cleansed face, avoiding the delicate eye area. Allow the mask to sit for about 15-20 minutes.
- Relax: While the mask works its magic, find a comfortable spot to relax. Consider placing cucumber slices over your closed eyes for an added spa-like touch.
- Rinse Off: After the designated time, rinse the mask off with lukewarm water. Gently pat your face dry with a clean towel.
- Moisturize: Finish your skincare routine by applying a lightweight, oil-free moisturizer to lock in hydration without clogging pores.
# Chocolate And Clay Face Mask
Creating a DIY chocolate and clay face mask combines the decadence of chocolate with the cleansing and detoxifying properties of clay. This mask can help draw out impurities, unclog pores, and leave your skin feeling refreshed and revitalized. Here's how to make your own chocolate and clay face mask:
Ingredients:
2 tablespoons cocoa powder (unsweetened)
1 tablespoon bentonite clay or kaolin clay (adjust quantity based on your skin's sensitivity)
1 tablespoon plain yogurt
1 teaspoon honey
1 teaspoon water (as needed for consistency)
Optional: 2-3 drops of essential oil (such as lavender or tea tree) for added benefits
Instructions:
- Prepare Your Work Area: Ensure that your hands and all utensils are clean before you start. Tie back your hair to keep it away from the mask.
- Combine Cocoa Powder and Clay: In a mixing bowl, mix together the unsweetened cocoa powder and clay. Cocoa powder is rich in antioxidants, while clay helps in detoxifying the skin.
- Add Yogurt and Honey: Add plain yogurt and honey to the cocoa and clay mixture. Yogurt provides lactic acid for gentle exfoliation, and honey offers antibacterial properties.
- Adjust Consistency: Depending on the thickness you desire, add a little water to the mixture. Start with a teaspoon and add more as needed to achieve a paste-like consistency.
- Optional: Include Essential Oil: If you wish to incorporate essential oils for added fragrance and benefits, add 2-3 drops and mix well.
- Patch Test: Before applying the mask to your face, perform a patch test on a small area of your skin to check for any adverse reactions.
- Apply the Mask: Use clean fingertips or a brush to apply the chocolate and clay mask evenly to your cleansed face, avoiding the eye area. Allow the mask to sit for about 10-15 minutes.
- Relax: While the mask works its magic, find a comfortable spot to relax. Consider playing soothing music or using this time for meditation.
- Rinse Off: After the designated time, rinse the mask off with lukewarm water. Gently pat your face dry with a clean towel.
- Moisturize: Finish your skincare routine by applying a light, non-comedogenic moisturizer to hydrate your skin without clogging pores.
# Chocolate Face Mask With Cocoa Powder And Heavy Cream
Indulge in the luxurious sensation of a DIY chocolate face mask made with cocoa powder and heavy cream. This delightful mask combines the antioxidant-rich properties of cocoa powder with the nourishing and moisturizing benefits of heavy cream. Here's how you can create this sumptuous treat for your skin:
Ingredients:
2 tablespoons cocoa powder (unsweetened)
2 tablespoons heavy cream
1 tablespoon honey (optional)
1 teaspoon almond oil (optional for added moisture)
Instructions:
- Prepare Your Work Area: Ensure your hands and all utensils are clean before starting. Tie back your hair to keep it away from the mask.
- Mix Cocoa Powder and Heavy Cream: In a mixing bowl, blend the unsweetened cocoa powder and heavy cream together. Cocoa powder is loaded with antioxidants that can help revitalize your skin, while heavy cream provides deep moisture.
- Optional: Add Honey: To enhance the mask's soothing and antibacterial properties, you can incorporate honey into the mixture.
- Optional: Include Almond Oil: For extra moisture and skin nourishment, add a teaspoon of almond oil. Almond oil is known for its hydrating and skin-repairing qualities.
- Stir Thoroughly: Mix all the ingredients together until you achieve a smooth and creamy consistency. Ensure there are no lumps in the mixture.
- Patch Test: Before applying the mask to your face, perform a patch test on a small area of your skin to check for any adverse reactions.
- Apply the Mask: Using clean fingertips or a brush, apply the chocolate mask evenly to your cleansed face, avoiding the eye area. Allow the mask to sit for about 15-20 minutes.
- Relax: While the mask works its magic, find a cozy spot to relax. Consider placing cucumber slices over your closed eyes for an extra touch of relaxation.
- Rinse Off: After the designated time, rinse the mask off with lukewarm water. Gently pat your face dry with a clean towel.
- Moisturize: Finish your skincare routine by applying a light, non-comedogenic moisturizer to seal in the benefits and keep your skin hydrated.
# Toning Chocolate Face Mask
A DIY toning chocolate face mask can be a deliciously effective way to rejuvenate and tighten your skin. This mask combines the antioxidant-rich cocoa powder with natural toning ingredients to leave your skin feeling refreshed and revitalized. Here's how to create your own toning chocolate face mask:
Ingredients:
2 tablespoons cocoa powder (unsweetened)
1 tablespoon plain yogurt
1 tablespoon mashed banana (ripe)
1 teaspoon honey
1/2 teaspoon lemon juice (optional)
1/2 teaspoon olive oil (for dry skin) or aloe vera gel (for oily skin)
Instructions:
- Prepare Your Work Area: Ensure your hands and all utensils are clean before starting. Tie back your hair to keep it away from the mask.
- Mix Cocoa Powder and Yogurt: In a mixing bowl, combine the unsweetened cocoa powder and plain yogurt. Cocoa powder is rich in antioxidants, while yogurt provides lactic acid for gentle exfoliation.
- Add Mashed Banana: Incorporate the mashed banana into the mixture. Ripe bananas are packed with vitamins and minerals that nourish the skin and provide a natural toning effect.
- Include Honey: Add honey to the bowl for its antibacterial properties and skin-soothing benefits.
- Optional: Add Lemon Juice: If you have normal to oily skin and want to enhance the toning effect, you can add half a teaspoon of lemon juice for its astringent properties. Be cautious if you have sensitive skin, as lemon juice can be irritating.
- Optional: Adjust for Skin Type: Depending on your skin type, you can choose to add olive oil (for dry skin) or aloe vera gel (for oily skin) to the mixture. Olive oil provides extra moisture, while aloe vera helps control excess oil.
- Stir Thoroughly: Mix all the ingredients together until you achieve a smooth and consistent paste. Ensure there are no lumps in the mixture.
- Patch Test: Before applying the mask to your face, perform a patch test on a small area of your skin to check for any adverse reactions.
- Apply the Mask: Using clean fingertips or a brush, apply the chocolate toning mask evenly to your cleansed face, avoiding the eye area. Allow the mask to sit for about 10-15 minutes.
- Relax: While the mask works its magic, find a comfortable spot to relax. Consider practicing deep breathing exercises or mindfulness to enhance the relaxation experience.
- Rinse Off: After the designated time, rinse the mask off with lukewarm water. Gently pat your face dry with a clean towel.
- Moisturize: Finish your skincare routine by applying a suitable moisturizer to lock in the benefits and keep your skin hydrated.
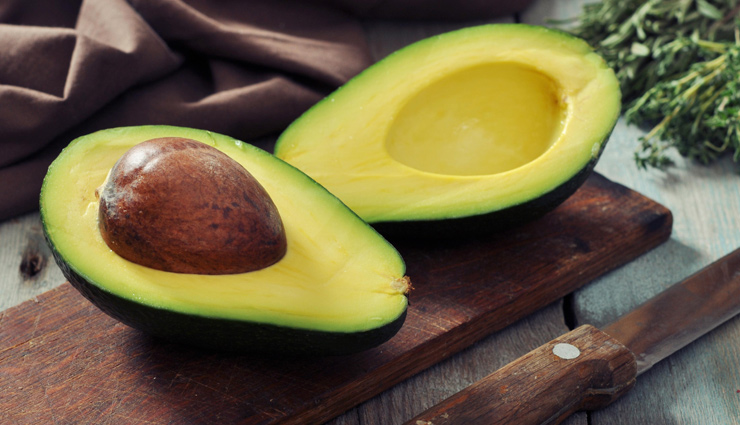
# Homemade Chocolate Face Mask For Dull Skin
Revive your dull skin with a homemade chocolate face mask that not only smells heavenly but also provides a boost of antioxidants to brighten and rejuvenate your complexion. This DIY mask combines the richness of cocoa powder with other natural ingredients to give your skin a radiant glow. Here's how to make your own chocolate face mask for dull skin:
Ingredients:
2 tablespoons cocoa powder (unsweetened)
2 tablespoons plain yogurt
1 tablespoon honey
1 tablespoon mashed avocado
1 teaspoon lemon juice (optional)
1/2 teaspoon turmeric powder (optional, for added brightness)
Instructions:
- Prepare Your Work Area: Ensure your hands and all utensils are clean before starting. Tie back your hair to keep it away from the mask.
- Mix Cocoa Powder and Yogurt: In a mixing bowl, combine the unsweetened cocoa powder and plain yogurt. Cocoa powder is loaded with antioxidants, while yogurt provides lactic acid for gentle exfoliation.
- Add Honey: Incorporate honey into the mixture for its moisturizing and antibacterial properties.
- Mash Avocado: Mash a ripe avocado and add it to the bowl. Avocado is rich in vitamins and healthy fats that nourish and hydrate the skin, leaving it soft and supple.
- Optional: Include Lemon Juice: If you want to enhance the brightening effect of the mask, add a teaspoon of lemon juice. Lemon juice has natural astringent properties that can help even out your skin tone. Be cautious if you have sensitive skin, as lemon juice can be irritating.
- Optional: Add Turmeric Powder: To add an extra element of radiance, you can include half a teaspoon of turmeric powder. Turmeric has anti-inflammatory properties and can help improve the skin's overall appearance.
- Stir Thoroughly: Mix all the ingredients together until you achieve a smooth and consistent paste. Make sure there are no lumps in the mixture.
- Patch Test: Before applying the mask to your face, perform a patch test on a small area of your skin to check for any adverse reactions.
- Apply the Mask: Using clean fingertips or a brush, apply the chocolate face mask evenly to your cleansed face, avoiding the eye area. Allow the mask to sit for about 15-20 minutes.
- Relax: While the mask works its magic, find a comfortable spot to relax. Consider practicing deep breathing or meditating to enhance your relaxation.
- Rinse Off: After the designated time, rinse the mask off with lukewarm water. Gently pat your face dry with a clean towel.
- Moisturize: Finish your skincare routine by applying a lightweight moisturizer to lock in the benefits and keep your skin hydrated.

# Chocolate Peel Off Mask
Creating your own DIY chocolate peel-off mask can be a fun and effective way to rejuvenate your skin. This mask combines the antioxidant-rich properties of cocoa powder with the skin-tightening effects of gelatin. Here's how to make a homemade chocolate peel-off mask:
Ingredients:
1 tablespoon unsweetened cocoa powder
1 tablespoon unflavored gelatin powder
2 tablespoons milk (or milk alternative for a vegan option)
1 teaspoon honey (optional, for added moisture)
A small microwave-safe bowl
A clean makeup brush or spatula for application
Instructions:
- Prepare Your Work Area: Make sure your hands and all utensils are clean before you begin. Tie back your hair to keep it away from the mask.
- Combine Cocoa Powder and Gelatin: In a microwave-safe bowl, mix the unsweetened cocoa powder and unflavored gelatin powder.
- Add Milk: Pour the milk (or milk alternative) into the bowl with the cocoa and gelatin mixture. Stir well to create a smooth paste. If you have dry skin, you can add a teaspoon of honey at this stage for added moisture.
- Microwave to Melt: Place the bowl in the microwave and heat it for about 10-15 seconds. You want the mixture to be warm but not hot. Stir to ensure the gelatin is completely dissolved.
- Patch Test: Before applying the mask to your face, perform a patch test on a small area of your skin to check for any adverse reactions.
- Apply the Mask: Using a clean makeup brush or spatula, apply the chocolate peel-off mask evenly to your cleansed face, avoiding the eye area and any hairlines. Apply a slightly thicker layer around the edges for easy removal.
- Let It Dry: Allow the mask to dry completely on your face. This typically takes around 20-30 minutes. You'll know it's ready when the mask feels tight and you can no longer move your facial muscles.
- Peel Off: Starting from the edges, gently peel off the mask in an upward motion. It should come off in one piece or several smaller pieces, depending on how thick you applied it.
- Rinse and Moisturize: After removing the mask, rinse your face with lukewarm water to remove any residue. Finish your skincare routine by applying a light moisturizer to keep your skin hydrated.
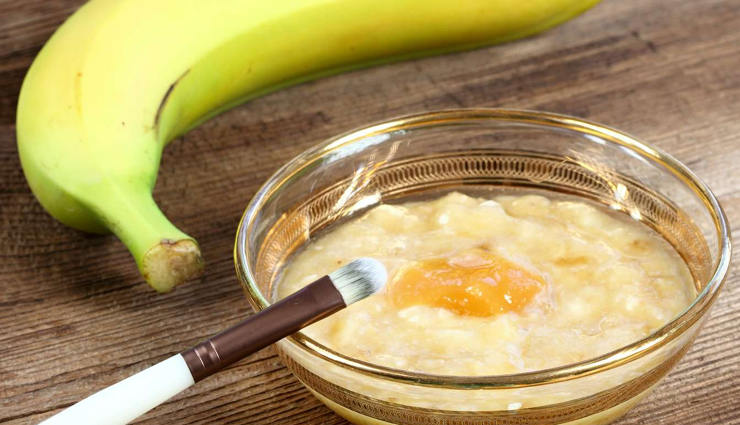
# Chocolate Banana Face Pack For Glowing Skin
Indulge in a delightful DIY chocolate banana face pack to pamper your skin and achieve a radiant glow. This mask combines the antioxidant-rich cocoa powder with the nourishing properties of banana to rejuvenate and brighten your complexion. Here's how to create your own chocolate banana face pack for glowing skin:
Ingredients:
1 ripe banana
1 tablespoon cocoa powder (unsweetened)
1 teaspoon honey
1 teaspoon plain yogurt
A small mixing bowl
Instructions:
- Prepare Your Work Area: Ensure your hands and all utensils are clean before starting. Tie back your hair to keep it away from the mask.
- Mash the Banana: In a small mixing bowl, peel and mash the ripe banana until it's smooth and free of lumps. Bananas are rich in vitamins and minerals that nourish the skin.
- Add Cocoa Powder: Incorporate the unsweetened cocoa powder into the mashed banana. Cocoa powder is packed with antioxidants that can help revitalize your skin.
- Include Honey: Add honey to the bowl for its moisturizing and antibacterial properties.
- Mix in Yogurt: Incorporate plain yogurt into the mixture. Yogurt contains lactic acid, which provides gentle exfoliation and helps improve skin texture.
- Stir Thoroughly: Mix all the ingredients together until you achieve a smooth and consistent paste. Ensure there are no banana lumps in the mixture.
- Patch Test: Before applying the face pack to your entire face, perform a patch test on a small area of your skin to check for any adverse reactions.
- Apply the Face Pack: Using clean fingertips or a brush, apply the chocolate banana face pack evenly to your cleansed face, avoiding the eye area. Allow the mask to sit for about 15-20 minutes.
- Relax: While the mask works its magic, find a comfortable spot to relax. Consider playing soothing music or meditating for a more serene experience.
- Rinse Off: After the designated time, rinse the face pack off with lukewarm water. Gently pat your face dry with a clean towel.
- Moisturize: Finish your skincare routine by applying a suitable moisturizer to lock in the benefits and keep your skin hydrated.