- Home›
- Healthy Living›
- Few Yoga Poses To Treat Arthritic Knee Pain
Few Yoga Poses To Treat Arthritic Knee Pain
By: Priyanka Maheshwari Tue, 25 Aug 2020 4:22:27

Arthritis technically means progressive worsening of the functioning of a joint. Commonly seen in people above the age of 50, many people encounter manifestations of arthritis in some form or the other (due degeneration or age related wear and tear). As a person ages, the cartilage present in between bones start to thin, and its load bearing capacity decreases. This causes the entire load of the body to get transferred onto the bone surface, just below the cartilage, leading to the formation of osteophytes (also known as bone spurs).
The most common symptoms of this condition is pain and swelling or stiffness of the knee. Joint inflammations may occur because of poor shock absorption capacity and routine activities that cause minor injuries to the knee joint. The pain could be dull, severe, only in front, all around the knees, at the back of the knee, at the side of the knee or along the thigh or calf. The pain could also be varying in intensity with different activities – climbing up and down the stairs, sitting, getting up, sitting cross legged, walking etc.

Nishpanda Bhava
Also known as the no-movement pose is a great way to relax, and beat stress. It also helps beat pain and keep your joints away from any kind of strain.
- Lean against a wall, touching your head to the wall and sit in a relaxed manner with your legs stretched in front of you
- Keep a distance of 2-3 feet between your legs
- Place your hands gently on your upper thighs with palms facing upwards
- Listen to the sound of any vehicle passing by at a distance
Sit in this posture for 5 mins and focus on any distant sound
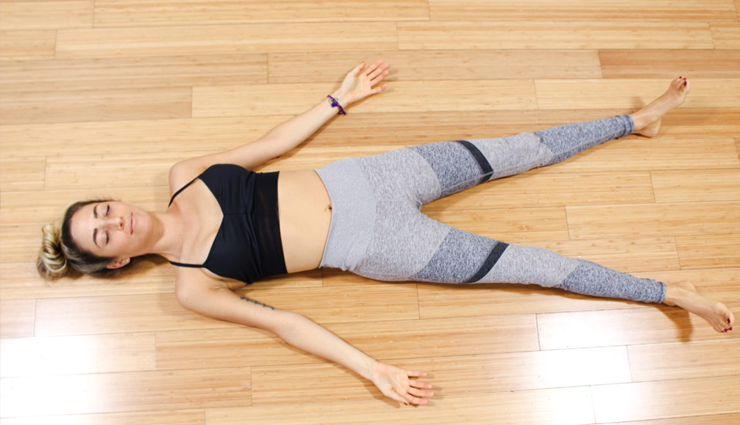
Savasana
Another relaxing pose, this asana helps to clam the body. It also helps in the recuperation of the muscles and joints after a lot of swelling and pain. Here is how you can do savasana or yog nidra the right way.
- Lie flat on your back, preferably without any props or cushions. Use small pillow below your neck if absolutely required. Close your eyes.
- Keep your legs comfortable apart and let your feet and knees relax completely, toes facing to the sides.
- Place your arms alongside, yet a little spread apart from your body. Leave your palms open, facing upward.
- Taking your attention to different body parts one by one, slowly relax your entire body.
- Begin with bringing your awareness to the right foot, move on to the right knee (as you complete one leg, move your attention on to the other leg), and so on, and slowly move upwards to your head, relaxing each part of the body.
- Keep breathing slowly, gently, deeply and allow your breath to relax you more and more. The incoming breath energizes the body while the outgoing breath brings relaxation.
- Drop all sense of hurry or urgency or any need to attend to anything else. Just be with the body and the breath. Surrender the whole body to the floor and let go. Make sure you don’t fall asleep!
- After some time, about 10-20 minutes when you feel fully relaxed, keeping your eyes closed, slowly roll onto your right side. - Lie in that position for a minute or so. Then, taking the support of your right hand, gently sit up into a seated pose such as Sukhasana (Easy Pose).
- Keep your eyes closed and take a few deep breaths in and out as you gradually become aware of your environment and the body. When you feel complete, slowly and gently open your eyes
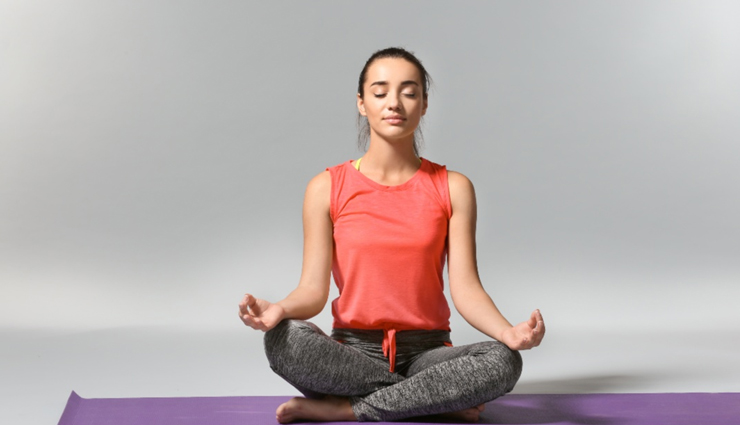
Sukhasana
Also known as the easy pose, sukhasana is meant to help your knee regain flexibility and to beat pain. If you cannot bend your knee, you can try doing this asana while sitting on a chair. Read more about the steps to perform sukhasana.
- Begin seated in Dandasana
- Cross the right shin in front of the left, so that the knees stack over the feet
- Be directly on top of the sitting bones, so that the bowl of the pelvis is upright, neither spilling forward nor backwards
- Clasp the knees with the hands and use the arms to pull the length of the spine forward and up
- Draw the sacrum towards the navel and the thoracic spine towards the sternum
- Maintain this active and lifted spine and turn the palms to face the ceiling, drawing the hands back until the heads of the upper arms are in line with the side body
- Press down firmly with the sitting bones to elongate the spine any amount more, lifting and opening the chest
- Notice if the front ribs have flared and instead soften them
- Center the head directly over the pelvis with the chin level to the floor
- Maintain a soft and steady gaze
- Hold for anywhere from 10 breaths to several minutes, then switch the cross of the legs and repeat on the other side.
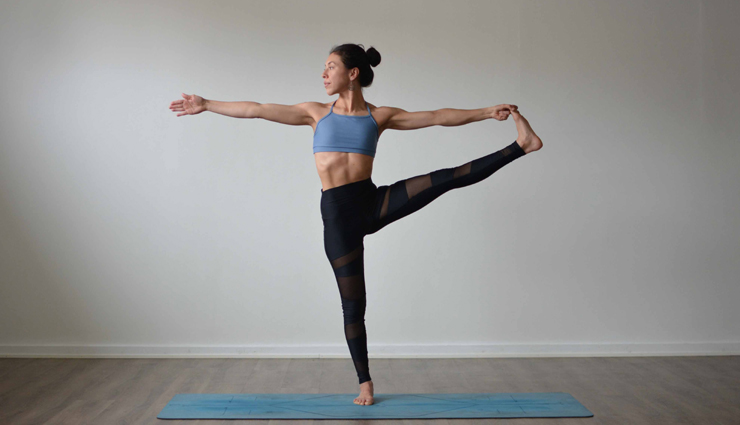
Hastha padangusthasana yoga
Also known as the extended hand to big toe pose, this asana helps strengthen the muscles around the knees, therefore beating knee pain. It also helps increase flexibility thereby reducing the chances of injury. For people with arthritic knee pain, this asana should be performed as they lie down. Here is how to do the Hastha padangusthasana yoga.
- Stand upright with your inner feet parallel and about six inches apart. Contract your front thigh muscles to lift your kneecaps. Keeping your legs completely straight, exhale and bend forward from your hip joints, moving your torso and head as one unit
- Slide the index and middle fingers of each hand between the big toes and the second toes. Then curl those fingers under and grip the big toes firmly, wrapping the thumbs around the other two fingers to secure the wrap. Press your toes down against your fingers. (If you can't reach your toes without overly rounding your back, pass a strap under the ball of each foot and hold the straps)
- With an inhalation, lift your torso as if you were going to stand up again, straightening your elbows. Lengthen your front torso, and on the next exhale, lift your sitting bones. Depending on your flexibility, your lower back will hollow to a greater or lesser degree. As you do this, release your hamstrings and hollow your lower belly (below your navel) as well, lightly lifting it toward the back of your pelvis.
- Lift the top of your sternum as high as you can, but take care not to lift your head so far that you compress the back of your neck. Keep your forehead relaxed.
- For the next few inhalations, lift your torso strongly as you continue to actively contract your front thighs; on each successive exhalation, strongly lift your sitting bones as you consciously relax your hamstrings. As you do this, deepen the hollow in your lower back.
- Finally exhale, bend your elbows out to the sides, pull up on your toes, lengthen the front and sides of your torso, and gently lower into the forward bend.
- If you have very long hamstrings, you can draw your forehead toward your shins. But if your hamstrings are short, it's better to focus on keeping the front torso long. Hunching into a forward bend isn't safe for your lower back and does nothing to lengthen your hamstrings.
- Hold the final position for one minute. Then release your toes, bring your hands to your hips, and re-lengthen your front torso. With an inhale, swing your torso and head as a single unit back to upright.
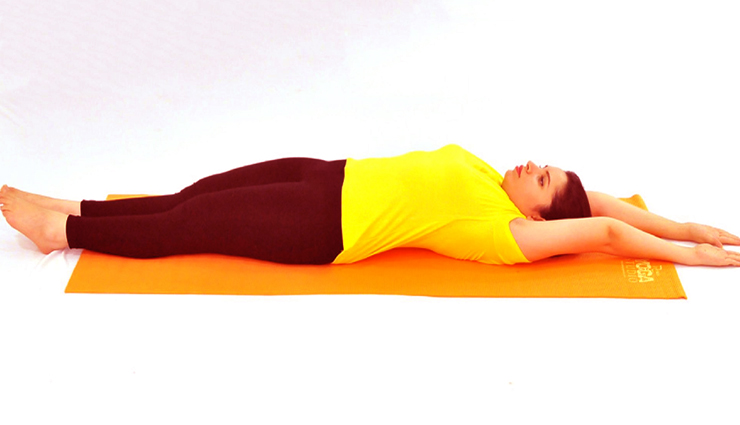
Yastikasana
Yastikasana or the stick pose is a great asana that facilitates maximum stretching of the body. It helps negate the ill effects of sitting in a bad posture for long periods of time, relaxes tense abdominal and pelvic muscles, and offers rest and relaxation, helping you beat fatigue and stress. For people with arthritis this pose should be done with their ankle stretched upwards. Here is how you can do this asana.
- To do Yastikasana or Stick Pose, Lie down flat on the floor or on the Yoga Mat.
- Take your hands above the head while lying flat on the floor and stretch them.
- Stretch your legs as maximum as you can
- Please ensure that while practicing Yastikasana or Stick Pose, there should be minimum gap between the arms and legs.
- Feel the stretch in the body as Yastikasana or Stick Pose stretches the whole body.
- Maintain this position for as long as possible.
- Come to original position or relax in Shavasana.
- Practice Yastikasana or Stick Pose Yoga for 5-6 times to reap the maximum benefits.