- Home›
- Healthy Living›
- 5 Yoga Asanas To Get Toned Arms
5 Yoga Asanas To Get Toned Arms
By: Priyanka Maheshwari Fri, 23 Feb 2024 10:45:16
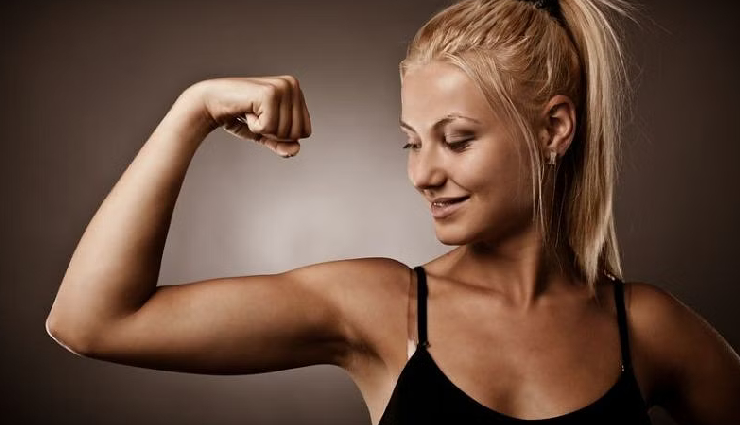
Aren't well-defined arms incredibly attractive? Stick with practicing yoga, and soon enough, you'll proudly showcase those gorgeously sculpted arms you've been longing for.
Yes, it's true. I'm not joking. It's achievable. By selecting the appropriate poses and mastering them effectively, you're on the right path. It might sound straightforward, but perhaps you could use some guidance.
That's where I come in. Consider me your personal yoga enthusiast. I've conducted experiments, consulted with yoga experts, and curated the seven most effective yoga poses for toning your arms, making you shine like a star.
Trust me on this and keep reading.
How to Enhance Arm Strength Through Yoga
Powerful arms leave a lasting impression, don't they? They empower you to tackle life with confidence and stability. Instead of hitting the gym and lifting weights, simply roll out your yoga mat and engage in yoga.
Yoga stands as the ultimate method for building upper body strength. It's a gift from the ancient Indian yogis, and we should fully embrace it rather than questioning its ability to tone our arms.
Yoga cleverly employs your body weight as the ideal "weight" to challenge your muscles. It utilizes your own resistance, which is truly remarkable, and that's why it deserves a try.
All you need to do is leverage your body weight intelligently and find the right balance to achieve your desired results.
So, to bid farewell to arm fat and welcome sculpted arms, continue reading.
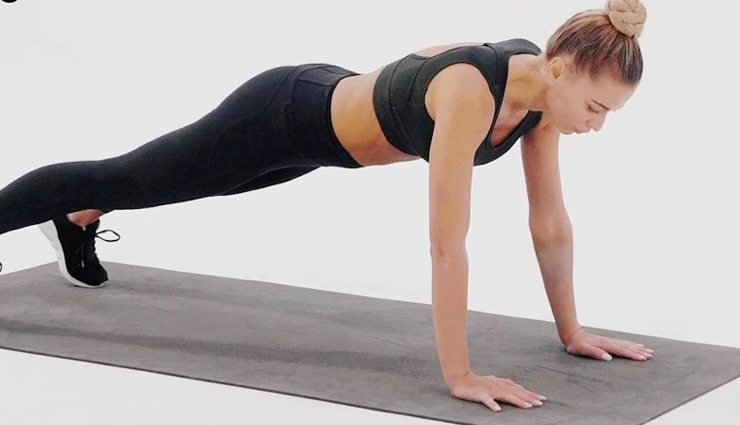
# Chaturanga Dandasana
Chaturanga Dandasana, also known as Four-Limbed Staff Pose, is a challenging yoga pose that requires strength and proper alignment. Here are the steps to practice Chaturanga Dandasana:
- Starting Position: Begin in a high plank position with your hands shoulder-width apart and wrists directly under your shoulders. Your body should form a straight line from your heels to your head. Engage your core muscles to support your spine.
- Shift Forward: Shift your weight slightly forward so that your shoulders come past your wrists. Keep your elbows hugged in close to your ribs throughout the movement.
- Lowering Phase: As you exhale, slowly lower your body down toward the floor while maintaining a straight line from your head to your heels. Your elbows should stay close to your sides, pointing backward rather than flaring out to the sides. Keep your body parallel to the ground.
- Stop at 90 Degrees: Lower down until your elbows are bent at approximately 90 degrees. Your upper arms should be parallel to the floor. Avoid letting your shoulders dip below your elbows.
- Maintain Alignment: Keep your core engaged and your body in a straight line. Avoid sagging your hips or letting your lower back collapse.
- Hold briefly: Hold the pose for a few breaths, maintaining the engagement of your core and leg muscles. Keep your gaze slightly forward to help maintain alignment.
- Transition: From Chaturanga Dandasana, you can either move into Upward Facing Dog (Urdhva Mukha Svanasana) by straightening your arms and lifting your chest, or you can move into Downward Facing Dog (Adho Mukha Svanasana) by pressing back through your hands and lifting your hips up and back.
- Rest and Repeat: After holding the pose, release to the floor and rest in Child's Pose (Balasana) or Upward Dog (Urdhva Mukha Svanasana) before repeating the pose or moving on to the next one in your sequence.
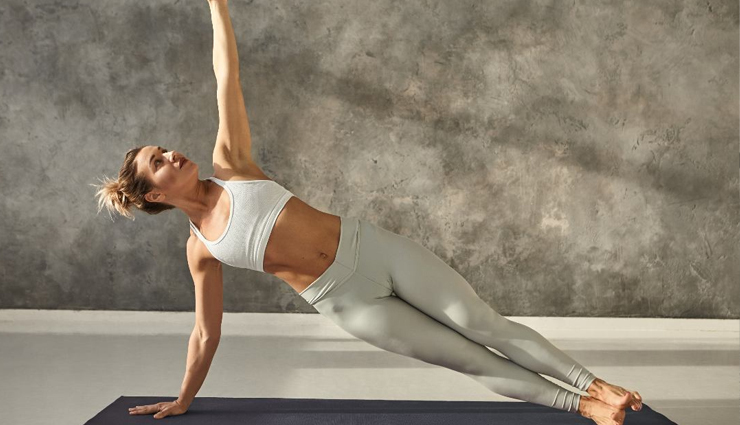
# Vasisthasana
Vasisthasana, also known as Side Plank Pose, is an intermediate to advanced yoga pose that strengthens the arms, wrists, shoulders, core, and legs while improving balance and concentration. Here are the steps to practice Vasisthasana:
- Starting Position: Begin in a high plank position with your hands shoulder-width apart and wrists directly under your shoulders. Your body should form a straight line from your heels to your head. Engage your core muscles to support your spine.
- Shift Weight: Shift your weight onto your right hand and outer edge of your right foot as you prepare to come into the side plank position.
- Stack Feet: Rotate onto the outer edge of your right foot and stack your left foot on top. Your body should now be balanced on the outer edge of your right foot and your right hand, with your feet and shoulders stacked vertically.
- Raise Hips: As you inhale, lift your left arm straight up toward the ceiling, reaching through your fingertips. At the same time, lift your hips up toward the ceiling, creating a straight line from your heels to your head. Your body should form a diagonal line.
- Engage Core and Legs: Engage your core muscles to stabilize your body in the side plank position. Keep your legs active and strong, with the inner thighs lifting toward the ceiling and the feet flexed.
- Gaze: Your gaze can be straight ahead or toward your top hand, whichever feels most comfortable for your neck.
- Hold: Hold the pose for several breaths, maintaining steady breathing and focusing on stability and alignment. Aim to hold for 20-30 seconds initially, gradually increasing the duration as you build strength and stability.
- Release: Exhale as you carefully lower your left hand back to the mat, returning to the high plank position.
- Repeat on the Other Side: After a brief rest, repeat the pose on the other side, balancing on your left hand and outer edge of your left foot.
- Rest and Rebalance: After completing Vasisthasana on both sides, rest briefly in Child's Pose (Balasana) or Downward Facing Dog (Adho Mukha Svanasana) to release any tension and rebalance the body.
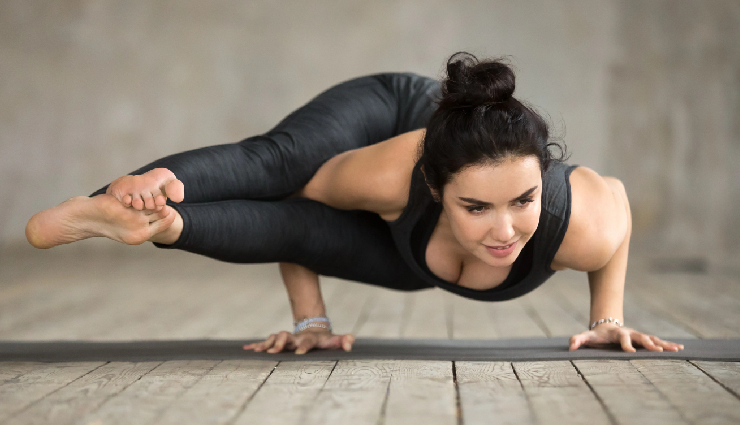
# Astavakrasana
Astavakrasana, also known as Eight-Angle Pose, is an advanced arm balance yoga pose that requires strength, flexibility, and balance. Here are the steps to practice Astavakrasana:
- Preparation: Begin by sitting on your mat with your legs extended in front of you. Bend your knees and place your feet flat on the floor.
- Cross Ankles: Bend your knees and cross your right ankle over your left ankle, bringing your right foot to the outside of your left thigh.
- Thread Arms: Slide your right arm between your bent right knee and your torso, and then wrap your right arm around your right shin.
- Plant Hands: Place your hands firmly on the mat beside your hips, fingers spread wide and pointing forward. Press into your hands to lift your hips slightly off the mat.
- Shift Weight: Shift your weight onto your hands and begin to lift your hips higher, coming onto the balls of your feet.
- Bend Elbows: Bend your elbows slightly as you lean forward, bringing your torso closer to the ground.
- Hook Legs: Hook your left ankle over your right ankle, crossing your legs at the shins. Your left ankle should be hooked over your right ankle, and your left foot should be flexed.
- Engage Core: Engage your core muscles to stabilize your body and keep your legs hooked together.
- Lift Hips: Use the strength of your arms and core to lift your hips higher, bringing your legs and torso parallel to the ground.
- Straighten Arms: Straighten your arms as much as possible, pressing firmly into the mat to support your weight.
- Extend Legs: Extend your legs forward, straightening them as much as possible while keeping them hooked together.
- Hold and Breathe: Hold the pose for several breaths, maintaining steady breathing and focusing on balance and stability.
- Release: To come out of the pose, slowly release your legs and lower your hips back down to the mat. Uncross your ankles and extend your legs in front of you to release any tension.
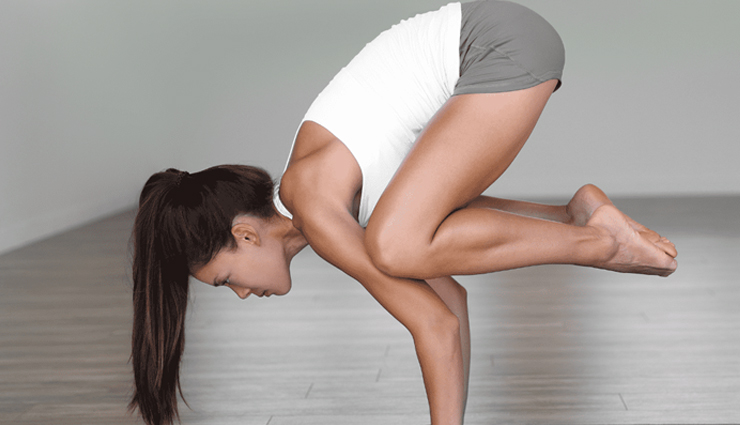
# Bakasana
Bakasana, also known as Crow Pose or Crane Pose, is an arm balance yoga pose that strengthens the arms, wrists, and core muscles while improving balance and concentration. Here are the steps to practice Bakasana:
- Starting Position: Begin in a squat position at the top of your mat with your feet hip-width apart. Lower your hips toward your heels, coming into a squat with your heels lifted if necessary. Place your hands on the mat shoulder-width apart, fingers spread wide, and palms pressing firmly into the ground.
- Bend Elbows: Keep your arms straight initially. Then, bend your elbows slightly to create a shelf for your knees to rest on. Keep your elbows hugged in close to your sides.
- Shift Weight Forward: Shift your weight forward onto your hands, coming onto the balls of your feet. Keep your gaze focused slightly forward to maintain balance.
- Knees to Triceps: Lift your hips slightly and bring your knees to rest on the backs of your upper arms, as high up as possible toward your armpits. Keep your knees close together.
- Engage Core: Engage your core muscles by drawing your navel in towards your spine. This will help stabilize your body in the pose.
- Lift Feet: Begin to shift more weight into your hands as you lift one foot off the ground, then the other. Keep your toes pointed and legs squeezed together.
- Balancing: Shift your weight forward and lift your feet off the ground, balancing on your hands. Try to bring your big toes to touch or keep your feet close together to maintain balance.
- Hold and Breathe: Hold the pose for several breaths, focusing on steady breathing and maintaining your balance. Keep your gaze slightly forward to help with balance and concentration.
- Release: To come out of the pose, gently lower your feet back down to the mat one at a time. Straighten your arms and return to a squat position or come to a seated position to rest.
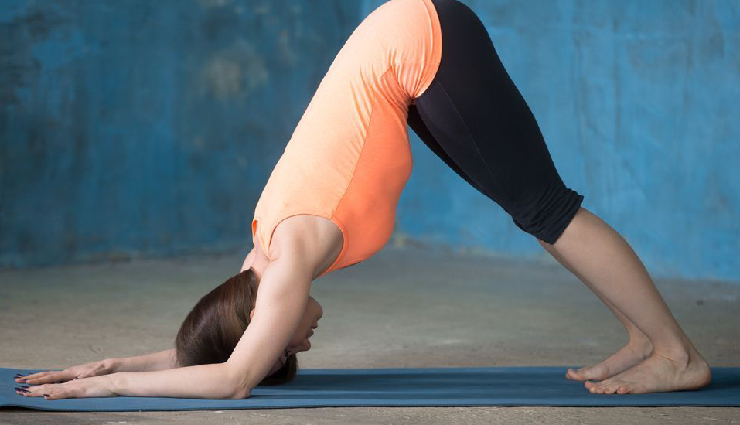
# Ardha Pincha Mayurasana
Ardha Pincha Mayurasana, also known as Dolphin Pose, is a preparatory pose for Pincha Mayurasana (Feathered Peacock Pose or Forearm Stand). Here are the steps to practice Ardha Pincha Mayurasana:
- Starting Position: Begin on your hands and knees, with your wrists aligned under your shoulders and your knees under your hips. Spread your fingers wide apart, pressing firmly into the mat.
- Forearm Placement: Lower your forearms to the mat, keeping them parallel to each other and shoulder-width apart. Your elbows should be directly beneath your shoulders. Ensure that your elbows are not splaying out to the sides but pointing straight forward.
- Interlace Fingers: Interlace your fingers, creating a solid foundation with your forearms and hands.
- Tuck Toes: Tuck your toes under and lift your hips up toward the ceiling, coming into an inverted "V" shape with your body.
- Lengthen Spine: Straighten your arms and legs as much as possible, while keeping a slight bend in your elbows. Press firmly through your forearms and hands to lift your shoulders away from the ears and lengthen your spine.
- Head Position: Allow your head to hang freely between your arms, with your gaze directed toward your feet or your belly button.
- Engage Core: Engage your core muscles by drawing your navel toward your spine. This will help to stabilize your torso and pelvis in the pose.
- Legs and Feet: Press your heels toward the mat as much as possible while keeping your knees bent. Your heels may or may not touch the mat, depending on your flexibility. The emphasis should be on lengthening the spine and opening the shoulders rather than forcing the heels down.
- Hold and Breathe: Hold the pose for several breaths, maintaining steady breathing and focusing on lengthening the spine and opening the shoulders.
- Release: To come out of the pose, gently lower your knees to the mat and rest in Child's Pose (Balasana) or Downward Facing Dog (Adho Mukha Svanasana) to release any tension.