- Home›
- Hunger Struck›
- Recipe- Extra Crispy And Easy To Make Buttermilk Waffles
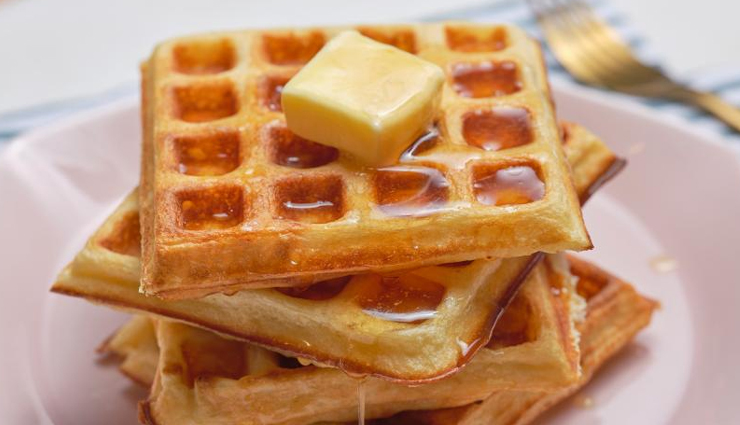
Recipe- Extra Crispy And Easy To Make Buttermilk Waffles
By: Priyanka Maheshwari Wed, 03 Feb 2021 1:20:06
Do a little digging for buttermilk waffle recipes and you can find all sorts of “classic” recipes that use everything from cornstarch to coconut flour. I’m sure those recipes are great, but I wanted to make real buttermilk waffles. The kind my grandma would have made, with 100% buttermilk and no surprising add-ins or zany substitutions. Just the basics for this waffle recipe, please and thank you.
Two bags of flour, a few dozen eggs, and several cartons of buttermilk later, and I think I’ve got an easy waffle recipe winner! Crispy on the outside, soft in the middle, and a rich buttery flavor, these buttermilk waffles just beg for jam and syrup.
This is an easy waffle recipe. But even with just buttermilk, flour, eggs, and melted butter as the main ingredients, there are a surprising number of ways to put these buttermilk waffles together. Seems as if there are a half dozen ways of how to make waffles. Who knew? How hard or how easy your waffle recipe is, depends largely on whether you beat eggs, separate eggs, and so forth.
Ingredients
2 cups (280g) all-purpose flour
2 tablespoons sugar
2 teaspoons baking powder
1 teaspoon baking soda
1/2 teaspoon salt
2 cups buttermilk, well-shaken
1/4 cup (1/2 stick) unsalted butter, melted
2 large eggs
1/4 cup melted butter for the waffle iron, optional

Method
* Warm the oven to 250°F. Set a wire metal cooling rack on top of a baking sheet and place in the oven. (You can also toast waffles directly on the oven rack, if you prefer.)
* Make the batter: Whisk together the flour, sugar, baking powder, baking soda, and salt.
* In a separate bowl, whisk together the buttermilk and butter, followed by the eggs.
* Stir the buttermilk mixture into the flour mixture. Continue gently stirring just until you see no more streaks of dry flour.
* Rest the batter while your waffle iron warms. Cover the batter with a clean kitchen towel and let it rest for at least five minutes while you warm the waffle iron. The waffle iron is ready when a drop of water sizzles on contact with the griddle.
* Make the waffles. Brush the waffle iron with melted butter, if you like. This helps give your waffles a golden color and prevents sticking, but isn't crucial for the recipe. Scoop 1/3 to 1/2 cup of batter into each grid of the waffle iron and cook until golden, according to your waffle iron's instructions.
* Transfer the cooked waffles to the oven. When the waffles are done, transfer them to the cooling rack on the baking sheet in the oven. Place them in one single layer so that they crisp evenly on top and bottom, and so steam isn't trapped between layers. Let them toast for 5 to 10 minutes.
* Cook the remaining waffles. Transfer each batch of waffles to the oven as they are ready. Waffles that have been toasting for a few minutes can now be stacked to make room for the following batches.
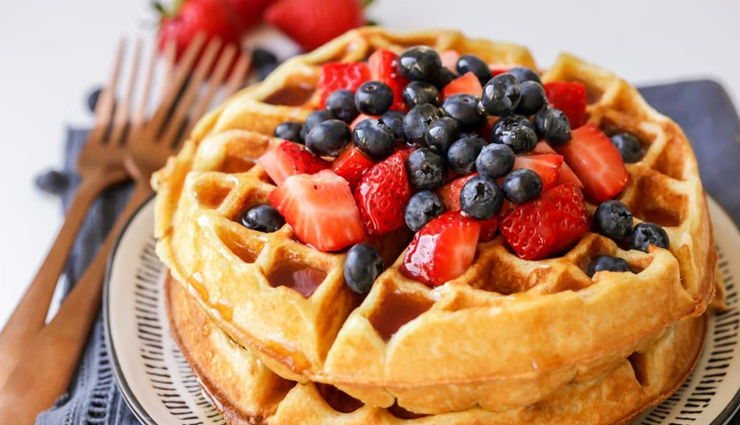
* Serve the waffles. Serve the waffles as soon as all batches are made and crisped. Let leftover waffles cool completely, then store in an airtight container in the refrigerator for up to a week, or freeze for up to 3 months. Reheat briefly in the toaster until warmed and crisped.