
- Home›
- Hunger Struck›
- Recipe For Tandoori Style Roti At Home
Recipe For Tandoori Style Roti At Home
By: Priyanka Maheshwari Sun, 13 Sep 2026 11:23:20
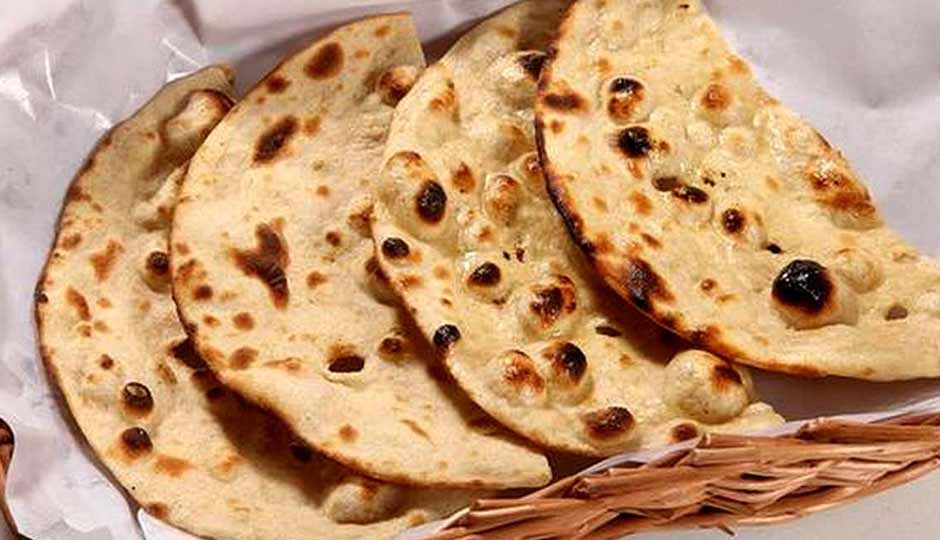
Making the perfect Tandoori Roti at home may seem like a challenging task. Many people assume that achieving the smoky, charred flavour of restaurant-style roti requires a traditional clay tandoor. As a result, attempts to recreate that authentic taste at home often end with flatbreads that are too hard, dry or chewy. However, with a few simple techniques and everyday kitchen tools, you can make soft, perfectly charred Tandoori Roti right in your own kitchen.
The key to getting the right texture and flavour lies in using an iron tawa along with a simple water-brushing technique. You don't need a professional tandoor, specialised equipment or expert cooking skills to achieve delicious results. With the right dough consistency, cooking method and a few useful tips, you can enjoy restaurant-style Tandoori Roti without any hassle.
A traditional Indian meal often feels incomplete without warm, freshly cooked and slightly smoky bread. Yet, many home cooks struggle with getting the dough just right or maintaining the correct cooking temperature. The type of pan you use also plays an important role. Unlike a non-stick pan, an iron tawa allows the roti to stick to its surface temporarily, helping it develop those characteristic charred spots. Follow this easy method to master soft, flavourful and beautifully charred Tandoori Roti at home.
Ingredients
2 cups whole wheat flour (atta)
2 tablespoons all-purpose flour (maida), optional
½ teaspoon salt
1 tablespoon curd
1 teaspoon oil or ghee
Approximately ¾ cup lukewarm water, as required
Extra dry flour for rolling
Water for brushing the roti
Butter or ghee for serving
Method
Step 1: Prepare the Dough
Take 2 cups of whole wheat flour in a large mixing bowl.
Add salt, curd and oil or ghee.
Mix everything well.
Gradually add lukewarm water and start kneading.
Knead for about 7–8 minutes until the dough becomes smooth and soft.
The dough should be slightly softer than regular roti dough. A soft dough helps prevent the tandoori roti from becoming hard.
Cover the dough with a damp cloth and let it rest for 20–30 minutes.
Tip: Do not add all the water at once. The exact quantity depends on the flour.
Step 2: Divide the Dough
After resting, knead the dough lightly once again.
Divide it into 6–8 equal portions and roll each portion into a smooth ball. Keep the dough balls covered so they do not dry out.
Step 3: Preheat the Tawa
For the best results, use a heavy iron or cast-iron tawa. Avoid a non-stick pan because the roti needs to stick temporarily to the tawa during cooking.
Place the tawa upside down over the flame if your stove setup allows it safely. Alternatively, use the flat side of a heavy iron tawa.
Heat it on medium-high to high heat until it becomes very hot.
Step 4: Roll the Roti
Take one dough ball and flatten it slightly.
Dust it with dry flour.
Roll it into a round or slightly oval roti.
Keep it slightly thicker than a regular chapati. A very thin roti can become dry and crisp.
The ideal thickness is approximately 2–3 mm.
Step 5: Apply Water
This is the important trick for making tandoori-style roti on a tawa.
Lightly wet one side of the rolled roti with water.
Spread the water evenly over the surface using your fingers or a pastry brush.
Do not soak the roti; it only needs a thin coating of water.
Step 6: Cook the Roti on the Tawa
Place the water-coated side directly onto the hot tawa.
Press the edges gently so the roti sticks properly.
Cook for around 30–45 seconds.
You will notice bubbles forming on the surface.
Now carefully turn the tawa upside down over the flame.
Cook the roti directly over the flame until you see brown and slightly blackened spots appearing across the surface.
This usually takes around 30–60 seconds.
Step 7: Remove and Finish
Once the roti has developed attractive charred spots and is cooked through, carefully remove it using a spatula.
Brush generously with butter or ghee while it is still hot.
Repeat with the remaining dough.